
Top 5 Tips and Tricks: Clothing
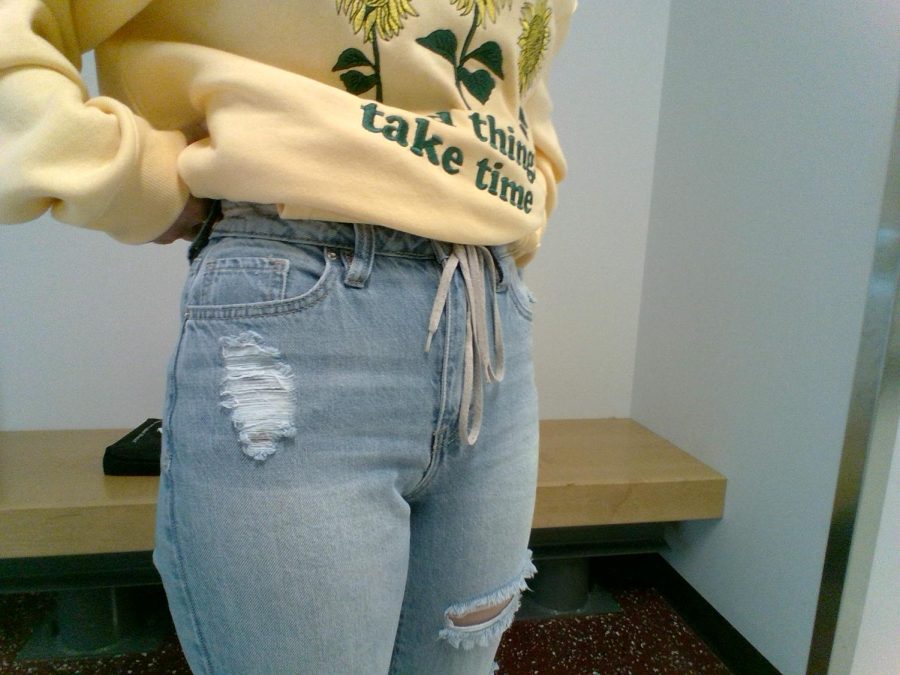
Tie It Tight A student shows off tied shoelace around the waist. Some students have started tying old shoelaces or similar materials in order to have the waist of their pants better fit them.
September 7, 2022
Fashion can be seen anywhere you go. We all wear clothes and have different types of styles. Trends come and go, they fill social media and people can use them as a way to identify themselves to others.
With new trends popping up, DIYs are a popular way to alternate clothes without having to spend money. Social media has become a prominent supplier of showing these DIYs. Some of these hacks are more helpful, and better looking, than others. Here are some of the best tips and tricks I’ve found for clothing.
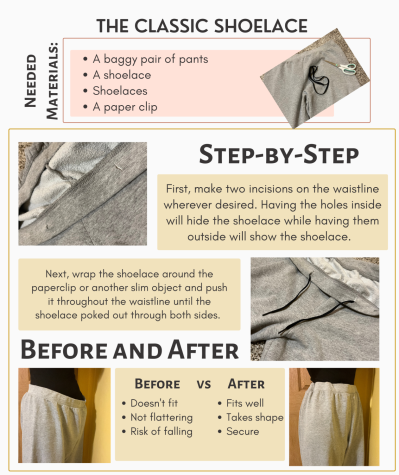
1. The Classic Shoelace
What you need:
- An old pair of pants
- A shoelace
- Scissors (optional)
- A paper clip (optional)
With baggy pants being in style, a lot of people now own a pair that might be a bit too spacious on the waist. Even with regular jeans, the space between hips and waist isn’t always proportionate to every wearer. This can get annoying at times, especially when sitting down and having an odd gap at the back. Thankfully, there is a quick solution for this if you’re in a hurry.
Most people have become aware of this trick as it’s one of the most popular tricks floating around both on the internet and here at school – the shoelace trick. For those who don’t know, many use shoelaces as a type of belt to cinch in the waist of baggier pants. There are two methods to this hack. One is the simple belt where the shoelace is inserted through the belt loops and tied to the person’s preference. The second method has a bit more effort put into it. In the second method, the people will cut two holes in the waistband. Depending on stylistic choice, they can choose these holes to be hidden on the inside or show on the outside. The shoelace will then be tied around the paper clip which will be inserted through one of the holes and be pushed through the other.
There’s no question as to why this trick got popular. It is one of my personal favorites in terms of quick DIYs because of its easy and quick execution. It can also be completely free depending on how many of the materials are already laying around the house. In terms of actual looks, the pants will turn out well visually in most cases. The only downside to this hack is that it is meant for slightly baggy pants. Having a pair that is too big will cause odd scrunching. Usually, it can be saved by bringing the fabric to the hips, but that isn’t always the case. If you own a pair of dress pants or overly sized pants, it’s better to have them sewn to your liking.
“I like it because it’s easier than buying new clothes. It helps pants fit my waist since it can be hard finding ones that fit both my legs and waist,” sophomore Mya Mielnik said.
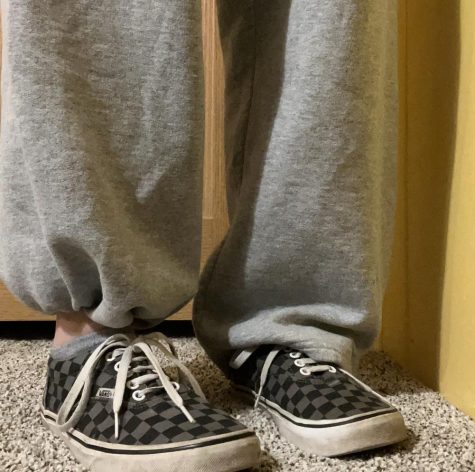
2. Secure Cuffing
What you need:
- Pants
- Two hair ties or rubber bands
As someone who is on the shorter side, I know that pants can be one of the most frustrating articles of clothing. Everything about the pair of pants will be perfect except for the length. More often than not, the same pair ends up in my closet. The obvious solution is cuffing, but sometimes the pants don’t always stay, and you end up tripping over them anyways. This next hack is the perfect solution and has quickly become one of my favorites.
If you’re about to leave the house and realize that your pants are a bit too long just grab two hair ties or rubber bands. Put each tie on your leg, under the pants legs. Then grab the bottom of the pants and flip them inwards. Push the bottom through the ties and adjust to your liking. It can take some maneuvering at first, but it gets easy after a few tries.
I was recently introduced to this trick, and it’s been a favorite of mine recently. I don’t like hemming my jeans, so I’ll grab two hair ties instead. It’s quick and a good solution if you’re running late. There’s barely any cost if you already own hair ties, but a pack costs around $3. Some people may not prefer this as it creates a similar style that elastic cuffed sweatpants have which might not work for all outfits and styles. The reason this hack is second instead of first is because there’s only one way to do it and still have it visually look good. If you were to cuff them the other way around, it would end up looking a bit odd. Although, overall it’s a simple and easy fix.
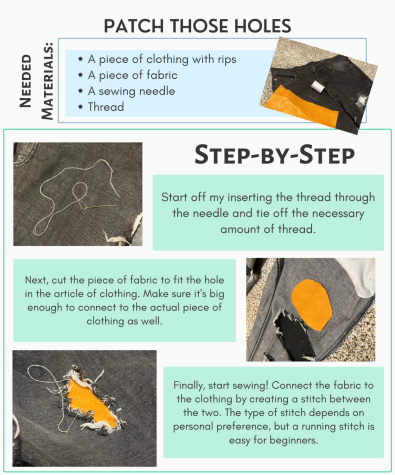
3. Patch It Up
What you need:
- Clothes with rips
- Fabric
- Thread
- Sewing pin
Whether it is a rip too high on a pair of jeans or somewhere on a favorite hoodie, unwanted rips in clothes are a pain to deal with. Sometimes they need to be sewn back together, but there are other ways to make them look appealing. One of the ways I started hiding holes is patching them up. There are decorative patches that are on the outer side of the hole or ones that are inside and have a duller look to them.
First, decide where the patch is going to be. Would it look better being inside or outside? Then get the piece of fabric that will be hiding the hole. Get your choice of thread. The color is based on whether you want the thread to show or not. You can use a color that matches the thread or use black for darker colors and white for lighter ones. Then put the thread through the needle, and tie it on the end. Start threading the fabric to the piece of clothing until it’s secure.
There are a few reasons as to why this was placed third and not second. First off, it takes a longer amount of time to sew the patch on the article of fabric. The person also needs some knowledge on how to sew and needs sewing materials for them to be able to do this. Besides that, the hack works well and it’s helpful to hide a rip. Plus, it adds style to the clothing.
4. Rip Them Up
- A pair of jeans
- A writing utensil or chalk
- Scissors
- Seam ripper or tweezers (optional)
Although a bit contradictory to the previous trick, ripped jeans have been in style since the late 80s and haven’t gone away since. They’re a staple in most cultures of fashion and just an overall classic piece of clothing. If you have a pair of jeans lying around that are never being worn, ripping them up can help be a great way to upcycle them and add a bit more character.
First, grab the pair of pants and put them on. Decide where you want the rips to be at, but remember if they’re for school don’t make them above mid thigh. Mark the area with a marker, or any writing utensil that will show. Lay the pants down on a flat surface and make a straight incision horizontally. After all of the main cuts have been made, start fraying around the holes. I personally like to use a seam ripper, but a pair of tweezers or fingers can also work.
Ripping jeans is a popular alteration that adds some flare to an old pair of jeans. This is placed after patching mainly because rather than being a trick to help make the clothing more wearable, this makes it more stylish. Although, it’s still useful. It’s versatile to the person’s taste as they get to choose where they want the rips and how big they want them to be. Like the previous hacks, the cost can be completely free. The biggest issue I personally have is the mess it can make while fraying. The time it takes can vary depending on person-to-person, but it often doesn’t take more than half an hour for me to get a nice pair of distressed jeans.
“When I was a youth I was very very punk…And so I would rip my jeans much to my dad’s dismay. So my favorite method was like, either a kitchen knife or taking like a seam ripper and then seam ripping along like the weft of the fabric and then rip it out…Fast fashion wasn’t something that really reflected my personality as much as I would like to do. So I DIY-ed a lot of stuff. But it was mostly just an expression of my own personal style,” English teacher Audrey Cromell said.
5. Bleach It
What you need:
- Bleach
- An article of clothing
- Hanger (optional)
- Rubber bands (optional)
- Paint brushes (optional)
Do you have a plain piece of clothing lying around? Is it never worn? Why not add some color to it to make it pop? Bleaching a plain, boring hoodie can turn it into something you want to wear everyday. It’s important to check if your clothes are safe to bleach based on the materials they are made of. (including list of what is an what isn’t okay)
Bleaching clothes has many different methods. There’s the tie-dye method, the spray method and the painting method. With the tie-dye method, scrunch the piece of clothing and wrap it with bands. Then put bleach on the clothing and wait for it to dry. The spray method uses a hanger to hold up the clothing while you spray the top several times and let any remaining bleach fall to the bottom. The painting method is for more precise designs. Get out a paintbrush and start painting the bleach onto the clothes until the design is to your liking. Make sure to wash out any remaining bleach before wearing the clothes.
I rated this trick lower for the same reason as why ripping jeans was placed low, it isn’t a necessity. Although it does help the clothing look more appealing, it does not help make it more durable in any way. Another reason for its low rating is because of its use for bleach. It can be dangerous if someone doesn’t take the proper precautions. While bleaching clothes, remember to be safe with the chemicals and bleach the clothes outside or in a well-ventilated area. As long as you’re safe while using the chemical, you’ll end up with a new fashionable article of clothing.